
I finally did it. I sat down and cleaned up my custom categories on TPT. This is something I have been putting off for years. And, once I finally did it, I wondered WHAT had taken me so long? Today I wanted to quickly share how to customize your categories on TeachersPayTeachers so you can do it too!
How to Customize your Categories on TeachersPayTeachers
It was actually so simple, so I’m going to give you the short version, and then I’ll walk you through exactly what I did each step!
- Choose your categories
- Choose your emojis or symbols (optional)
- Sort the categories and add line breaks
- Update products and their custom categories
Choose Your Categories
Okay friends, when does it NOT come back to data?? I knew I had way too many categories before that were too generic, and probably not helpful for guiding my customers in my store. I want those categories to be helpful as they’re shopping. So, I opened my 80/20 tool from Your Data Playbook(affiliate link) and took a glance at it. Then I wrote down things I noticed. Here’s what I wound up with!
I decided to start with my main “product lines”. These are things I have multiple blog posts for, Youtube videos on, opt ins, funnels, and probably have run specific sales campaigns for. These are things I talk about on repeat and are big bundles.
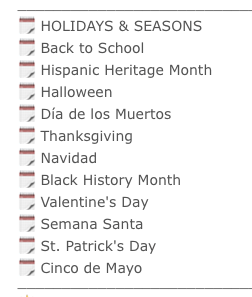
Then, I looked at holidays and seasonal resources. I wrote down which holidays stood out to me throughout the year.
Next came niche specific skills. These are things like grammar and vocabulary topics someone who is shopping might be looking for. I did not include ALL of them. This is just a sample of what’s in my store, again, based on data.
Finally, I did include a few “miscellaneous” categories. These are things I wanted to be able to easily send people to, but don’t necessarily have a stand out spot in my store. My resources for TeachersPayTeachers Sellers went here!
Choose Your Symbols
This is totally optional, but after grouping my products, I decided I wanted a visual in front of each link, for each group. I wanted to make this more like a bulleted list to help break it up. You could do this in a few ways, but I chose to pick one emoji per category and use it for the whole category. See below:
You can get emojis by just searching for the symbol you want online, or on my Mac I hit control + command + space and it pulls up the menu.
Sort the Categories and Add Line Breaks
Now that you have your plan, you’re going to start putting the actual categories in order and adding those line breaks. Do this by navigating to the Product Listing page, then selecting “Manage your categories” from the menu on the lefthand side.

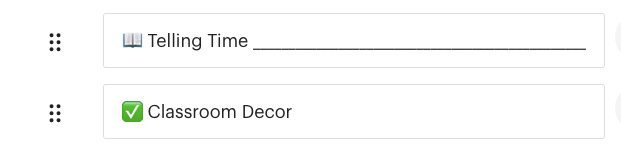
Type in your categories and symbols, then drag and drop them to where you want them to show up in the Custom Categories section on your storefront.
I chose to alphabetize some sections, but the holiday section I put in chronological order. Up to you! When you’re ready to add your line breaks, you will go to the last category in a section and add a space, then underscores. Check out the picture below!
Update Products and Add their Custom Categories
Last but not least, it’s time to go into the product listings themselves and make sure things are sorted where they belong!
I did not do all of these at once. In fact, I’m not even done. But I learned that some categories won’t show up unless you put SOMETHING in them, so all of my categories have at least one product in them. I intend on going through them to make sure I get things sorted a little at a time. This will likely happen while I watch a show or something, as it’s pretty mindless.
How to Customize your Categories on TeachersPayTeachers
I hope that helps if you’re considering customizing your categories! Drop a comment down below if you have any questions!
